Podcast project reflection:
I really enjoyed going through the process of how I paint pet portraits digitally. It made me realize how far I’ve come in learning how to make digital art. I’m excited to share this podcast with my students one day to encourage them to try new things and never give up. Art has a lot of ups and downs and it’s easy to get discouraged sometimes, I hope this podcast shows that with practice and dedication you can grow and get better no matter which medium you choose.
Bitmoji Classroom Project
Bitmoji Classroom Reflection: Making my bitmoji classroom was really fun, it helped me imagine what I want to teach in the future. I loved coming up with lesson ideas and thinking of creative ways to present them to my class. Designing the classroom environment and my bitmoji was enjoyable and not hard to figure out at all. This is something I would definitely use as a teacher to introduce my students to a new concept.
FlipaClip Animation: Scout Gets A Treat
This was my very first time doing animation. I chose to do a flip book style animation that tells a story about my dog Scout getting a treat. I used the app FlipaClip and it was pretty easy to jump right in and start drawing. There was a short tutorial that I watched, it was helpful, but a lot of what I discovered about how to animate in this style was learned by trial and error. I learned how to create patterns and how to edit the hard and easy way. At first I did edits one frame at a time and it was very tedious, but then I realized I could copy and paste or use the lasso tool to copy parts of a drawing and copy it to a different slide. Learning those little things are only going to happen through experience. I used the free version of the app, so there were a lot of pop-up ads, that was very frustrating at times. Ultimately I really enjoyed making this short animation and I’d definitely use the app again.
Pixlr App
App Review of Pixlr
For my app review I chose Pixlr after hearing about it in class. I have always used Photoshop Express because it used to be free except for the option to upgrade much like Pixlr. Pixlr reminds me a lot of Photoshop Express because it was very straight forward and easy to figure out without googling tutorials or searching YouTube videos for answers. I googled “Pixlr” and it came right up, I was able to easily create a free account and upload an image from my computer.
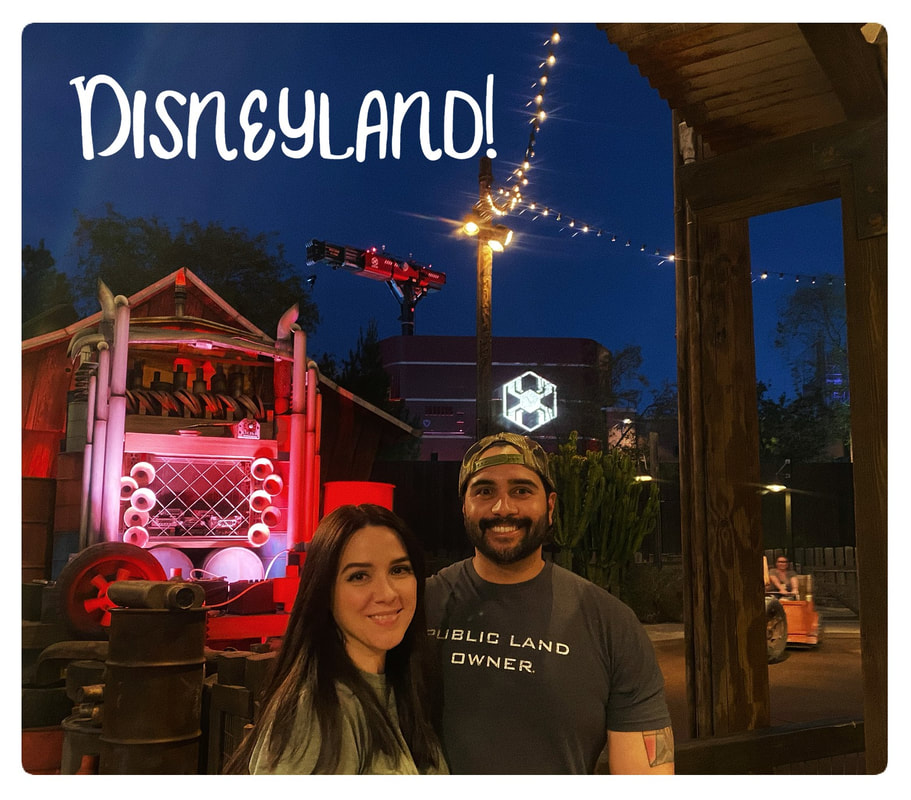
I chose a picture of my husband and I at Disneyland, I wanted to see if I could deepen the color and make it look richer and more vibrant. I also wanted to sharpen the image and make us a little clearer. As soon as I uploaded the picture it popped up with a menu to the left and layers to the right. I was not sure how to use the layers or why I would need to, but as I began to edit, I saw that the app placed the text and border I added each on separate layers. I really liked this feature because I could easily turn off a layer if I wanted to see the photo without something I previously added. I could also see the layers being helpful if you added a lot of elements to your photo and then forgot what you did. It is a great tool for organization.
There are more pros than cons with this app. I loved that you get a lot of options, for example, I added a frame, and I had a lot of choices of frames before I would have to pay for the premium subscription. The animation option was fun too and something I would expect to pay for, but it is included. I loved that I was able to animate the letters that I added and was given lots of choices for font style. Whenever I clicked on an option from the left side menu, a toggle slide appeared for you to be able to adjust. This was easy to understand and use. The only con for me personally was that you cannot edit the subject and background separately. I wanted to make the background more saturated in my photo, but it ended up saturating the entire thing. I wish there was a mask feature to be able to select specific areas to edit, that was a little frustrating.
Middle school and high school students would find this app easy to navigate because it is pretty user friendly. Everything is laid out for you, just by hovering over the icons you can see what they are, and you can just click “undo” if you make a mistake. In the classroom I think this would be a great tool for students and teachers for the yearbook or if there was a photo collage project. Being able to add text and animation would make this a fun option to use for the podcast project we just did in our class. I would like to use this to edit photos quickly over Photoshop simply because it is less intimidating. I did not feel the need to look anything up and although kids today are pretty tech savvy, I think they would find it easier to use than Photoshop as well.
As far as skills, I think the app would help with learning how to design layouts for something such as flyers or ads. It would help with composition skills and color editing for photography. Learning about contrast, brightness, hue, and saturation is great for art students. Those skills help when doing traditional art as well. The skills you use for editing apps such as this one are translatable in many professions because most workplaces are using social media to advertise. I believe students will need to know and be comfortable with at least the basics of a program like Pixlr.
Overall, I would give this app a 9 out of 10 because I thought it was easy to navigate and did not require more than about 5 minutes to understand how to use it. Also, the fact that the user is given a wide range of free options is great too.
How to Draw a Face Tutorial
How to Draw a Face Tutorial Video
Link to tutorial video: https://youtu.be/pQbHGIZRncg
Reflection: This was my first time making a video tutorial. I filmed myself drawing the picture first then edited the speed and cut it down in Imovie. I wanted to speed it up even more to be able to fit all the steps in so I transferred the video to In Shot and edited the speed, added the music, voiceover, the background color and text. Once I finished editing the video, I used an app called Veed to add the closed captioning. I uploaded the tutorial to You tube and made a step by step PDF tutorial with screenshots from the video. Overall this was a great learning experience and there are many things I would do differently next time. While filming the video I had to hold my phone in one hand and draw with the other which made it difficult to hold the camera steady. I have purchased an overhead phone holder for future tutorials! I'd probably skip Imovie and just use In Shot to edit since it had all the features I needed to create the video. Overall it was fun and I can not wait to make more.
